Thursday, May 28, 2020

How to connect MacBook to printer wirelessly?

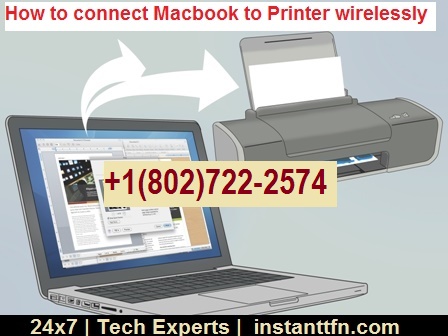
What are the methods for connecting a printer to MacBook wirelessly?
Do you want to connect your MacBook to a printer? Well, many people get intimated by the thought of adding a printer to their device. Once a person gets acquainted with the method of adding a printer to the device fairly, it becomes easier for them to connect it. However, you can add a printer to any device by making a wired as well as wireless connection.  Moreover, if you are wondering about how to connect MacBook to printer wirelessly, then go through the procedure explained below.


What is the process to connect printer via WPS?

Connecting your MacBook to printer is possible by adding it through WPS after switching on the WiFi button on printer. Hence, the steps to connect printer to MacBook wirelessly via WPS are as below:
·       Turn on your MacBook and tap the Apple icon from the top corner of screen
·       Then open System preferences tab and choose Printer & scanners
·       Next tap on plus sign to search for the nearby printers
·       Then choose a printer from default list that you want to add in your MacBook
·       Next select the driver or software of the chosen printer and tap on add button

What is the process to connect printer using IP address?

If you are thinking that how to connect MacBook to printer wirelessly, then you can also add with IP address. Hence, the steps to connect MacBook to printer wirelessly via IP address are as below:
·       Go to the Apple icon on your MacBook screen
·       Next, select the System Preferences options and go to Printers & scanners
·       Then, move to the printers list and tap on the plus sign given below
·       Next, select the IP icon and enter the IP address of the printer you want to connect
Therefore, your inquiry about how to connect MacBook to printer wirelessly is resolved above by explaining the other method. In case you failed to add a printer on your MacBook somehow, get help from a technical person by connecting to its customer care center.

Monday, May 25, 2020

DNS server not working on Windows,how tix?

DNS server stops working


DNS server refers to Domain name server hep to covert alphanumeric domain names into numeric IP addresses in very east way. It acts as a translator between IP address and host name. But many times DNS server not working on windows and does not connect properly. In that case here are some few tips and tricks to fix it.

How to fix  DNS server stops working?

Follow these troubleshoots in order to fix DNS server
  • Change web browser- many switching browsers can help to solve the issue. Check the application settings and ensure that users using the latest browser. Users can also reinstall the browser.
  • Deactivate firewall-  in case changing browser is not helping you and DNS server not working on windows then temporarily rule out the Firewall and deactivate it then check if the server started working or not.
  • Restarting Router- many times restarting router can help to solve the problem. Users can either press the button or hard reboot by pulling out the power plug.
  • Change DNS server – if these above troubleshoot does not help then try to change the DNS to Google’s public DNS obtainable by internet.  But in this case, the user will have to change manually.

These are the following troubleshoot to make if the DNS server not working on windows, for more information go to the website or call the toll free number in order to talk to the executive.

Friday, May 22, 2020

How to fix,Quickbooks error code 3371?

How to Fix QuickBooks Error 3371? 


QuickBooks Error 3371 status code 11118 shows on your screen when you attempt to dispatch License Properties. An error message will spring up on the screen "Couldn't instate permit properties". This error won't license you to get to QuickBooks Software till you would not fix it. In the event that you are confronting QuickBooks Error 3371 and need to determine it, at that point you are in the opportune spot. We will assist you with getting free of this error in this blog. 

Causes behind QuickBooks Error 3371 


Recorded underneath can be the reasons for error 3371 status code 11118:

1. When the adaptation of the Windows working framework has lapsed.

2. If there is a harm in your organization document then this can be the purpose behind Error 3371.

3. When you attempt to open an unsaved document.

4. If the QuickBooks permit is outdated.

5. Interruption by the Anti-infection may likewise prompt this error.

Manifestations of QuickBooks Error 3371

Following are the manifestations that will assist you with understanding when will the error 3371 status code 11118 emerges:

1. When you can't get to your organization document.

2. If the PC isn't working appropriately.

3. When you need to confront any aggravation at the hour of opening QuickBooks.

4. If you get any update for a secretive HTML record.

How to Fix QuickBooks Error 3371 Status Code 11118? 


You can experience the accompanying answers for dispose of QB error 3371:

Arrangement 1: Eliminate ecml File

1. In the start, press Windows +R together.

2. Enter C:\Program data\Intuit\Entitlement Client\v8 Path in the Window.

3. When the Window Explorer will open, Delete ecml document.

4. Close your Windows.

5. Now, you can run QuickBooks.

Arrangement 2: Restore Windows Operating System

1. Select the "start" button.

2. Click on "All Programs" and pick "Windows Update".

3. Verify for refreshes.

4. In the end, reinstall QuickBooks Desktop once more.

Arrangement 3: Download the Latest Windows Update

You have to download the most recent update of Windows and introduce it.

Arrangement 4: Rename the Entitlement File

In the event that you are utilizing Windows XP, at that point experience the means recorded underneath:

1. Click on Start and select Run.

2. To demonstrate privilege DataStore, Add the way "C: archives and settings AllUsersApplication DataIntuitEntitlement Clientv2".

3. Now, press OK.

4. Rename the document.

In the event that you are utilizing Windows 7, at that point follow the means composed beneath:

1. First of all, Add "C: ProgramDataIntuitEntitlement Clientv".

2. Next, Rename the document.

3. You get another record made by QuickBooks.

4. If you can't see Data Folder, at that point follow the means composed underneath:

Go to "Sort out" and search alternatives in the envelope.

Now, select "Shrouded Files and Folders".

In the end, you need to check whether the QuickBooks Error 3371 is settled or not.

The previously mentioned manifestations and causes will assist you with preventing from error 3371 status code 11118 and we are trusting that the above-composed arrangements help you to fix this error. In the event that, if the arrangements composed above don't help you in fixing "QuickBooks Error 3371 status code 11118" or you need any help with respect to the equivalent. At that point, you can get in touch with us our Error Support Number.

Wednesday, May 20, 2020

Yahoo mail not working,How do I fix it?

Fix yahoo mail not working on chrome

Yahoo mail is one of the popular email services which are mostly used by everyone. We have many problems in yahoo problem. The main problem is yahoo not working on chrome. We have solutions to fix the problem. There are many reasons to fix the problem of yahoo mail.

Why is Yahoo mail not working on chrome?

Yahoo mail is not working due to various reasons like slow loading issue of yahoo, intent issue, settings issue, if you have not updated the yahoo mail and many more. But no need to panic in that situation, we have number of ways to fix it. We can fix the problem of yahoo not working on chrome by various methods.

How to fix yahoo mail not working on chrome?

It is easy to fix the issue of yahoo mail not working on chrome. You should read below methods to fix the problem.
  •         Clear your caches and cookies: You should clear the cache and cookies from the browser. Check the issue is fixed or not.
  •         Update your browser: You should update your browser to the latest version. Update your browser to the latest version and check the issue is fixed or not.
  •         Restart your device and browser: You should restart your device. This is the basic solution to fix the problem. You can easily fix the issue of yahoo mail. Check the issue is solved or not.
  •         Use UR browser: If you will use the UR browser, you can fix the problem yahoo not working on chrome. You should check the problem is solved or not.
  •         Enable the JavaScript: To enable the JavaScript, you need to follow some points. It can fix the issue of yahoo mail not working on chrome.
  •         Troubleshoot internet connection: You should check your internet connection before using the yahoo mail service. If the problem is there, you should troubleshoot your internet connection.

These are the methods to fix the problem of yahoo mail not working on chrome. If you are still facing the issue, then you can contact Google customer service. They will give you expert advice and give you necessary assistance. They will give you most precise and effective solutions. They are available 24*7 in your service.

Monday, May 18, 2020

Android TV not connecting to WiFi. How do I fix it?

How to fix the problem of Android TV not connecting to the Wi-Fi?


Android TV is one of the many forms of TV’s that are available to the user but this device is more than the normal televisions because they have amalgamated the features of both normal TV and the features for the operation of the app.

Android TV is used by a multitude of people around the globe but some of them complain about the problem of android tv not connecting to wifi that hampers the operation of the device.

Methods to fix the connectivity issue

There are various methods to solve this problem some of the most useful ones are.

  • Restart the Android TV

The user should turn off and restart the TV because reinitiating the device improves the efficiency of the operating system by refreshing it and terminating any program that is creating obstacles & creating the issue of android tv not connecting to wifi.
  • Restart the Wi-Fi router

The user should turn off the power supply to the Wi-Fi router to switch it off and then turn that power supply on to reconnect to the Android TV with the right credentials.

In addition to this, the user is recommended to change the Wi-Fi password at regular intervals for avoiding any kind of network hacking.

  • Resetting the Wi-Fi network

The user can reset the network of the Wi-Fi by Forgetting the network in the Android TV to resolve the issue of android tv not connecting to wifi, all that a user is required to do is to visit the settings section of the device and forget the Wi-Fi’s network connection then re-add the connection by entering the credentials of the Wi-Fi.

Other Methods to resolve this problem

There are numerous other methods that can be used to solve this problem.

  • Check the advance setting of the Wi-Fi connection and configure it to provide the relevancy.
  • Place the Wi-Fi close to the Android TV device but ensure that there should be a distance of a minimum of 3 feet between both the devices.
  • The user is also recommended to update the operating system of the TV device to make it compatible with the applications running in it. 
  • Disconnect all other networks from the Wi-Fi router or change the wireless network connection 
  • Stabilize the Wi-Fi connection by making some amendments in the dormancy settings of the network.

If the user is unable to resolve the issue of Android tv not connecting to wifi then he can contact the customer support of the manufacturer of the Android TV or customer care of the Wi-Fi to get additional information to solve this problem.

Thursday, May 14, 2020

Netflix not working on Apple TV,How to fix?

How to solve the issue of Netflix not working on Apple TV?

Netflix is the American online streaming digital platform that has a humongous userbase of billions and counting across the world and most of them try to access its services by using the Apple TV.

Some users face the problem of Netflix not working on Apple TV device and get the message that Netflix is Currently Unavailable, this problem can be solved by using these methods.

Check the Network Connection of the Apple TV

Netflix works only with the availability of the network connection thus a user is recommended to check the network settings to remove this problem, for this, a user can follow this process.

  • Open settings in the Apple TV and select Network.
  • Then the user is required to select Wi-Fi options or an Ethernet option if getting the internet through the cable.
  • Then configure the IP address by selecting Configure IP option.
  • The user should also configure the DNS.

If the user is not able to solve the issue of  Netflix not working on Apple TV with this technique then he can select the other available options.

Select the right time zone

Netflix, when work in the device needs to access the time zone to ensure that the user is getting the video content according to the laws of the region thus he needs to use the below-mentioned process.
  • Open settings in the Apple TV and select Network.
  • From the available options, select the General section.
  • In the DATE AND TIME section, on the option of Set Automatically.

If the automatic option is not working then the user can also manually submit the information about the region. Other solutions to resolve this problem
The user can also solve the issue of non-working of Netflix by using these points.

  • The user should update the software of the Apple TV and also update the Netflix app.
  • Switch-off the Apple TV and other hardware.
  • Cut the power supply of Apple TV to avoid over-heating.
  • Delete the Apple TV app and re-install it from the App store.

The user can also get the solution of Netflix not working on Apple TV by establishing contact with the customer service of NetFlix and if the problem is caused by TV then the customer support of Apple and get the solution.

Wednesday, May 13, 2020

AOL Account Recovery Steps | AOL password reset Steps

How to recover AOL Account?


Is your AOL email account is not working while signing-in using its correct email address and password. You are the best place where you can learn simple methods to recover the password in many ways. When you forgot or hacked your password, you should select the tab of AOL Account recovery that will provide you basic guidance to enter the new password without facing any trouble. If you are still want to know the few measures in order to reset the password, then before that you need to have information about the verification resources that will provide you basic guidance and help to reset or recover the password of the AOL email account easily.

Take a look at the ways to reset the password of AOL email account:
If you have registered your mobile phone number or email address, you can easily find out the verification resources that will provide you basic help to enter the new password into the field online. However, if you want to know the basic ideas that will show you relevant help to enter the new password in many ways and that are the methods that help to recover the password in no time simply.

Here are the ways for AOL password reset within a second:

  •          First of all, sign in your account using the correct email address and password and try to access.
  •          If you are unable to access click on forgot password button and enter either a mobile phone number or security question or alternate email address.
  •          Select the verification code from the resources and move to the next where you can enter the code.
  •          After that, a password reset link will be showing on the next page allows entering the new password.
  •          Enter the new password into both new and confirm password field at the end of the task.

Thus, you can simply proceed with the AOL Account recovery process that will help to enter the new password in no time easily.

Tuesday, May 12, 2020

How do I search for Laptop Repair Near me?

How Do I Search for a Laptop Repair Technician near Me? 


Whenever you see some problems with your laptop, you try to troubleshoot to fix it. But there are also times when basic troubleshooting doesn't help. In such cases, you look out for some experts who can assist you and rectify the glitch. If you are seeing issues and not able to resolve them on your own, you can search for a laptop repair technician near your location. And to do so, you should follow the given step.

Steps to Find a Nearby Laptop Repair Technician 

  • First and foremost, you need to open the browser and go to the search engine page. 
  • Once you reach there, you should type "laptop repair near me" and click Enter. 
  • In this way, all the available service providers will be shown on your screen. You need to select a reliable one. 
  • You should check the consumer ratings and feedback given by customers to know about the services of repair technicians. 
  • After that, when you open the website, you will see options to connect with the technicians over a phone call. 

And you need to dial the customer service phone number and explain the problem that you are facing with your laptop. Once the representative answers your call, you will be provided with the required solution without any delay.  This is how you will no longer worry about laptop repair near me and your laptop issue will be fixed without much of a stretch. 

Friday, May 8, 2020

How to install Malwarebytes ?

What is Malwarebytes, and how to install Malwarebytes on Mac?


Malwarebytes is one of the software that keeps the device healthy by providing protection to the device from the harmful malware that can hamper the proper working of the device.

Malwarebytes can be downloaded on various device including the Mac device because most of them complain about the malware attack and need to know how to install Malwarebytes.

How can a user install Malwarebytes on Mac?

To install this software, the user is required to download it from the official website and then complete the installation process by using this method.

  • Select and open the option of Malwarebytes in the program list of the application folder.
  • On getting the End User License Agreement (EULA) option, click on Agree.
  • Complete the installation process.

The user can also install the Malwarebytes on the Mac device by using another method.

The installation process of Malwarebytes on Mac

An additional method to complete this task can be done by first downloading the updated version of Malwarebytes in the Mac and follow this process.

  • Search and open the downloaded file on the device.
  • To start the installation process, drag & place Malwarebytes in the Application folder.
  • In the Application folder, open Malwarebytes and provide the administrator password.

Now the user needs to click on the Install helper option and complete the process.

The user can use the above-given methods and get the answer of how to install Malwarebytes on Mac and they can also contact the customer support of Malwarebytes to obtain more information.

Friday, May 1, 2020

How do I search for Mac computer repair technician near me?

Find out Mac computer repair technician near me
In this digital world, it is difficult to work without computer. We should keep our device proper. Computers plays crucial role in our day to day life. It should be safe and secure. It should be repaired fast if you have any problem in your Mac computer. Mac computer repair are easily available near you.  It stops all your work. Nowadays, you can repair your device at home also as they can come home and repair your device. They have so many different services by which we can repair our device. You can easily find repair service near you.
Mac computer is like a computer only but it is of Apple Company. If any problem persists in your computer, you should repair it soon and call mac computer technician so that he or she can repair it fast. You should search different ways to get you device repaired as soon as possible.
How do I search for Mac computer repair technician near me?
You should keep some points in your mind while calling somebody for Mac computer repair. Here are some key points to remember. Before repairing your device, you should know basic things about repairing the device.

  •        It is easy and convenient to get home service if your device is in warranty period.
  •        Including repair services, they have many more services available with them. Their descriptions are available online.
  •        You can also get online services which are available on their online portal for mac computer repair.
  •        The technician will repair all parts of the device if it is in a warranty period.
  •        They are available 24*7 in your service. You will get the necessary assistance.
  •        You can also get onsite assistance; you can tell them the issue and they will fix in no time.


These are some ways by which you can get free home service for your Mac computer or any other device. In case you do not receive onsite services, you can contact to a mac computer technician and get it fixed in no time. You can also visit the help desk. They have a helpline numbers; you can call them and clear your queries. You will get proper assistance and they will give you effective solutions.